Setup Email Account in MS Outlook
Below are the steps on how to setup your NetVault Hosted Exchange email account in MS Outlook:

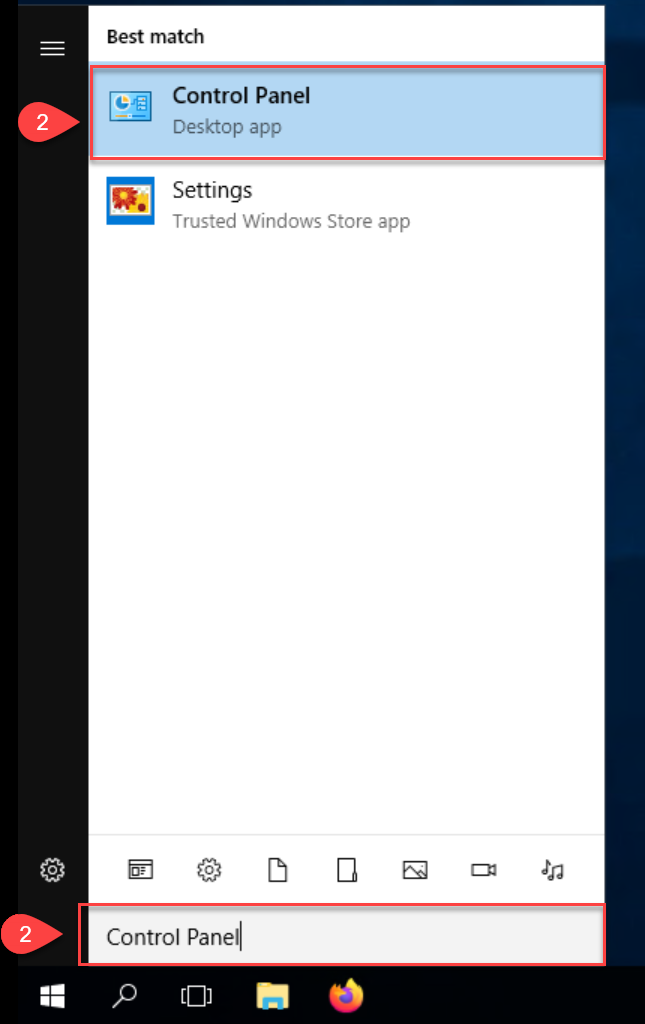


1. Open the Windows Start Menu.
2. Type “Control Panel” and click on the Control Panel entry.
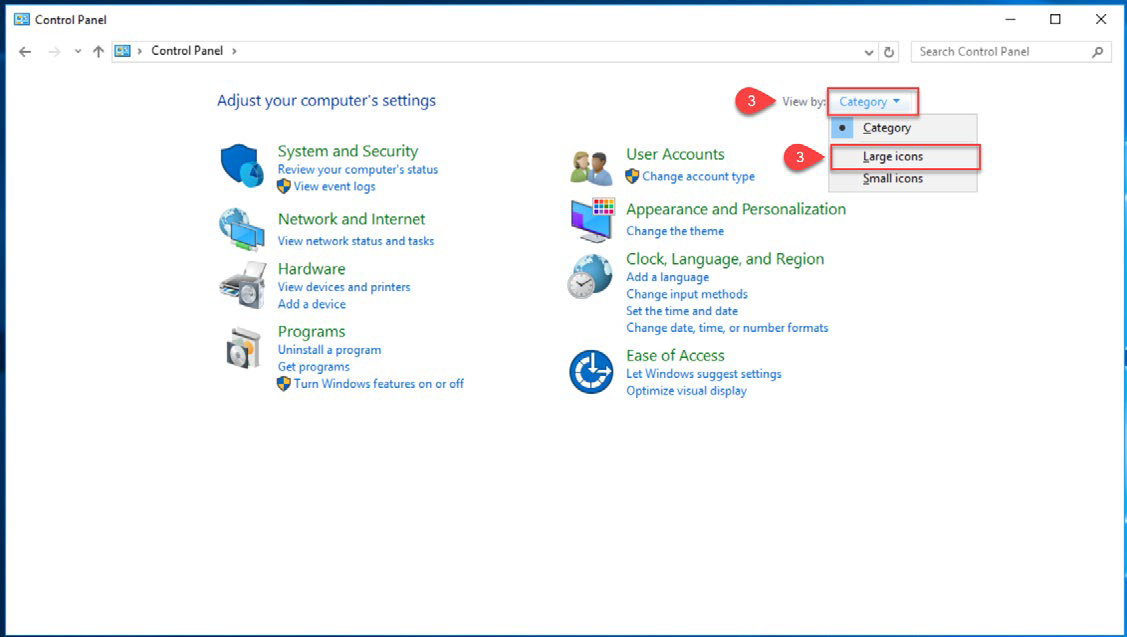
3. If you do not see a lot of icons like the below screenshot, change your “View by:” option to “Large icons”.
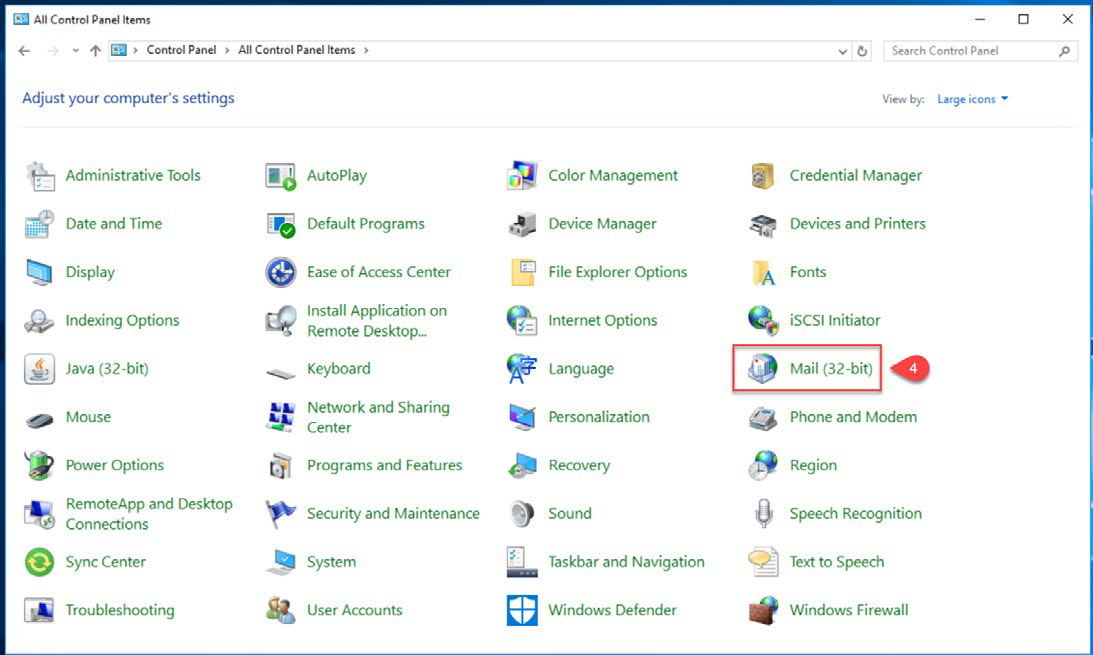
4. Next click on the “Mail” icon.
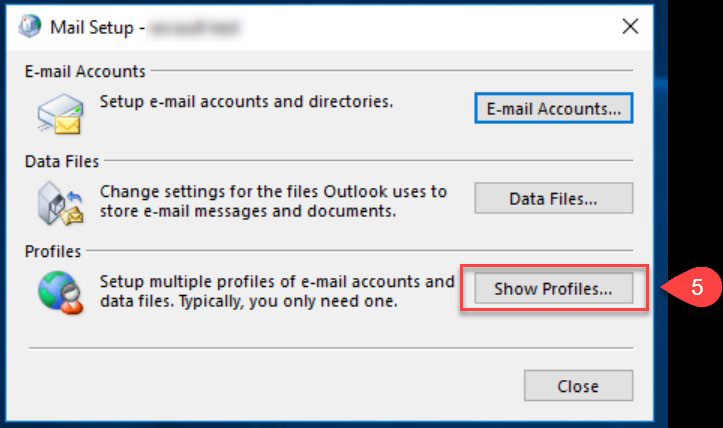
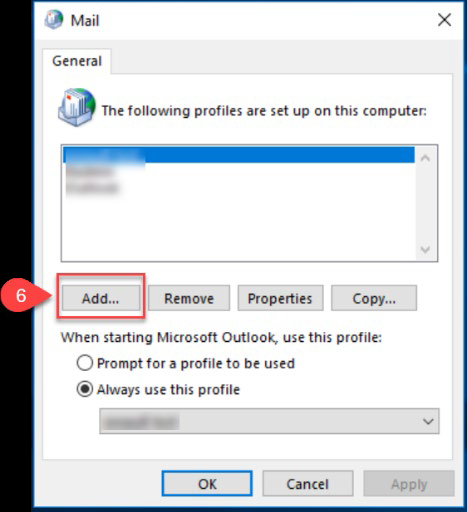
5. Now click on the “Show Profiles…” button.
6. Click on the “Add..” button.
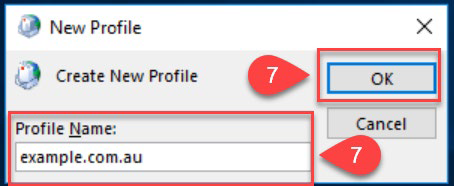
7. Now type in a name for the new profile and then click on the “OK” button.
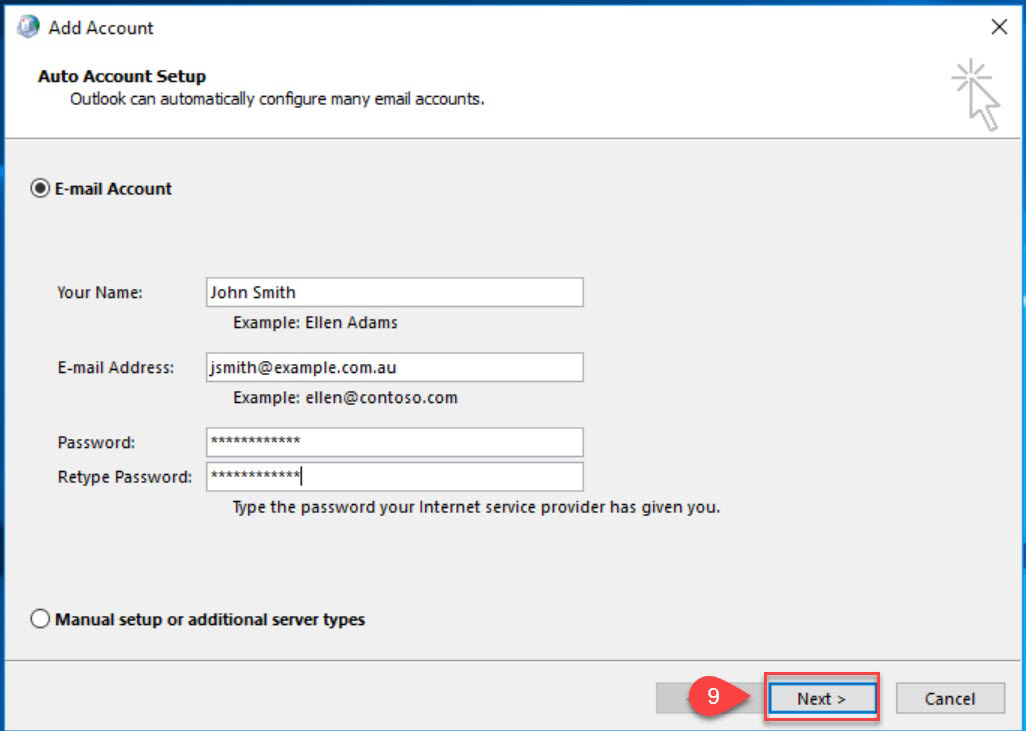
8. Under the E-Mail Account section fill in the following details:
a. Your Name
b. Your Email address
c. Your password for your account
d. Re-enter the same password
a. Your Name
b. Your Email address
c. Your password for your account
d. Re-enter the same password
9. The click on the “Next” button.
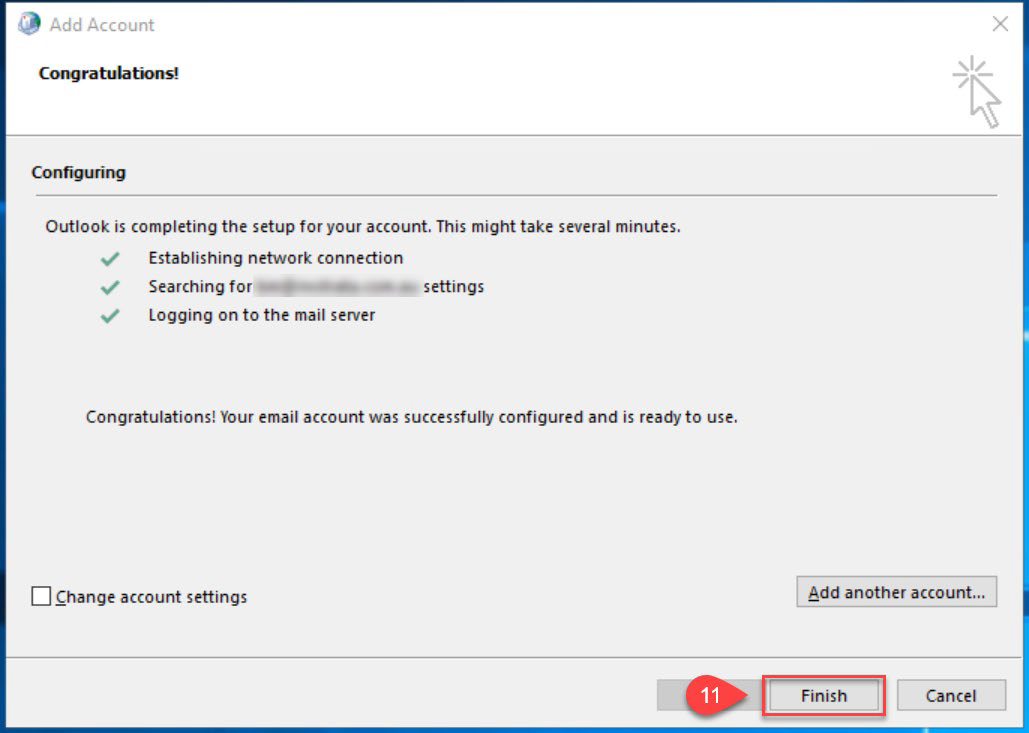
10. If any popups appear, click on either “Yes” or “Ok” to continue.
11. Once the auto configuration process is complete click the “Finish” button.
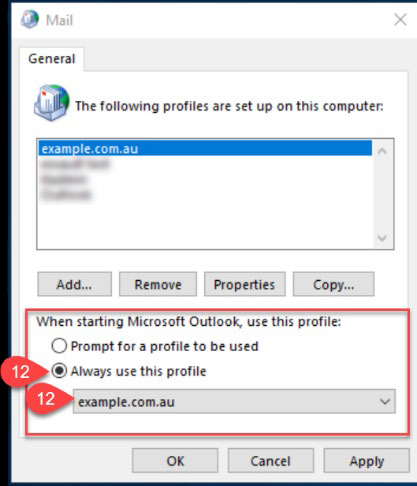
12. Under the “When starting Microsoft Outlook, use this profile:” section, make sure to have the “Always use this profile” selected and the drop down box set to the profile you have just created.
13. Finally click the “OK” button and open Outlook to start using your emails.
Related Articles
How to change your password
Below are the steps on how to change your password for your NetVault Hosted Exchange email account: 1. Open your Internet Browser and go to https://owa.yourdomain.com.au/owa or https://portal.exvault.com.au/owa. 2. Login using your username (email ...DNS Configuration
Below is the DNS record configuration details that will be required for your domain to run on NetVault’s Hosted Exchange Platform: The domain used in the example configuration below is - example.com.au DNS Record 1: Type - MX Name - Blank or @ ...Vodia PBX Documentation
Resources The Vodia PBX has grown for more than ten years into a complex tool that offers a lot of features, but also requires the know-how on how to run it. On this documentation portal you can find information on how to configure and operate the ...How to set Voicemail of 3CX Extension via Web Client / Desktop App
Open the 3CX Web Client or Desktop App. Login to 3CX Webclient using the extension number and extension password. (For example- https://netvault.3cx.com.au:5001/webclient ) Modify the 3CX URL according to your account details. If you're unsure about ...NBN FTTP - Level 1 Checks
The NBN Level 1 Checks for FTTP (Fiber to the Premises) are a set of basic troubleshooting steps to ensure that your NBN connection is functioning properly. Let's elaborate on each of these checks: 1. **NBN NTD Onsite Reboot:** - The NBN NTD (Network ...